FREE NATIONWIDE SHIPPING ON ORDERS $69 AND OVER
FREE NATIONWIDE SHIPPING ON ORDERS $69 AND OVER
Add description, images, menus and links to your mega menu
A column with no settings can be used as a spacer
Link to your collections, sales and even external links
Add up to five columns
Add description, images, menus and links to your mega menu
A column with no settings can be used as a spacer
Link to your collections, sales and even external links
Add up to five columns

Overwhelmed by your housework? Try this
December 10, 2020 7 min read
STOP FEELING OVERWHELMED BY YOUR HOUSEHOLD CLEANING!
TRY THIS 9 STEP PROCESS TO GET ‘ER DONE'
Cleaning can sometimes feel overwhelming, tedious and unsatisfying. But it doesn’t have to be! Following a logical, efficient process and doing that consistently, can make the daunting task of cleaning your entire home from top to bottom on a regular basis a satisfying (and dare we say a rather enjoyable!) experience.
Before we go into detail here’s an outline of the 9 steps we will be taking you through, read on for the full process...
- Tidy up - start by clearing the decks of all clothes, laundry, rubbish and dishes
- Wipe, shake out & dust - all surfaces and items in the dry rooms of your home
- Vacuum - everywhere! Including bathrooms, laundry and toilets to remove as much dust as possible before wetting later
- Clean kitchen
- Clean other wet areas (bathrooms, toilets and laundry)
- Clean glass (mirrors, glass surfaces and windows etc)
- Mop floors
- Finishing touches (remake beds, replace soft furnishings etc)
- Clean up your kit! (launder bedding, cloths, empty and clean vacuum cleaner etc)
That's it! Read on for the full guide.
General Tips:
- Systemise - go top to bottom, dry to wet
- Prepare your kit before you start (ensure your vacuum cleaner is empty, clean and ready to go, you have enough of each product you need and enough clean cloths to wash and dry with)
- Clear the decks! Tidy first.
- Treat it like a work out and get 2 for 1
Lets go! (sweat band and leg warmers optional)
Pick your weapons: Equipment List
- Prepare your vacuum cleaner by ensuring the bag or container is empty, filters clean and clear and no blockages in the hose or attachments - this ensures optimal suction and no wasted energy!
-
Gather your cleaning supplies. Make sure you have sufficient quantities of your non-toxic cleaning solutions and cleaning cloths as follow:
- All-purpose cleaning spray
- Bathroom cleaner
- Glass cleaner
- Cleanz Concentrate or floor cleaner (for floor - 2 tablespoons to 4 litres of water)
- Oxy Soak powder or similar (for laundry, toilet bowl and tiles / shower if required)
- Laundry liquid
- Scrubbing brush for tiled areas if required
- At least 6 microfibre cloths (or more) - 3 for wetting and wiping, 3 for drying and buffing
- 1 or 2 glass cleaning cloths (depending on how much glass you have to clean)
- Mop and bucket (or microfibre spray and wipe mop)
- Rubbish bags or bucket to collect rubbish in
- Vacuum cleaner: clean, clear and ready to go
Right, you are holstered and ready :)
Step 1- Start by tidying up:
- Collect, fold and put clothes and linens away neatly
- Make beds or remove dirty linen and take to laundry ready for remaking later (put a load on whilst you are cleaning!)
- Gather / empty rubbish, sorting into appropriate recycling, compost and landfill bins
- Take all dirty kitchenware (cups, glasses, plates etc) to the kitchen and pop them in the dishwasher if you have one
-
Clear the decks!
Step 2 - Get wiping and dusting
Lounges, Offices, Bedrooms & Hallways (all dry rooms)
- Using an all-surface friendly non-toxic soap-based spray cleaner, take a clean microfibre wet with warm water - start wiping all surfaces including tables, ledges, mantle pieces, picture frames etc (it’s sometimes easier to remove all objects and pop them in one area so you can thoroughly wipe all surfaces and put them back neatly afterward)
- Bang out any dusty rugs and cushions outside and keep them out until you have vacuumed & mopped the area
-
Move thoroughly through all dry areas in the home
Step 3 - Vacuum
Everywhere! (yes, before you have cleaned the bathroom & toilet)
- Move all small obstacles out of the way and pull chairs clear of tables etc in every room
NB: If you have a fireplace, clean out the ash with a shovel and brush first so that the small particles don’t clog your vacuum cleaners filter - Run the vacuum cleaner thoroughly through every area (including bathrooms and laundry before you clean it, to avoid having a wet floor that is then difficult to pick up hair and dust etc)
- Get into window and sliding door tracks with the appropriate attachment before we wet it later
- Use the upholstery attachment to remove dust from beds and furniture
-
Check up above for cobwebs and other sneaky dusty areas
Step 4 - Kitchens
- Clear the decks again! Place all dirties in the dishwasher or hand wash up, dry and put away neatly (wipe out any drawers or cupboards as necessary)
- Remove all objects from the bench top and place in one spot (like the dining room table or work island if you have one)
- Spray down bench tops, appliances and cabinetry with a non-toxic degreasing soap all-purpose spray cleaner
-
Take a clean microfibre (this one will be for the kitchen only now), wet with warm to hot water and wipe all surfaces.
NB: Good quality microfibre cloths work incredibly well on their own without product because their fibres are positively charged and are able to grab onto bacteria, which has an overall negative charge - they work even more efficiently with a good non-toxic surfactant based cleaner; effectively loosening, picking up and washing dirt and germs away, rather than just semi-killing some of them and leaving the rest on the surface like disinfectants and sanitisers do. - Buff dry all shiny surfaces such as glass or laminate splashbacks, appliances, stainless steel and reflective surfaces with a clean and dry microfibre cloth
-
Replace objects (having wiped them clean where necessary)
If you are doing a deep clean: (NB: you will need a few more cloths for this) - Start by spraying a non-caustic non-toxic oven cleaner into your oven (following instructions on the product) and use the dwell time to carry out the above (check out the Cleanz user guide for how to clean your oven with Cleanz + baking soda for a completely non-toxic clean)
- Remove grills from extractor fans / rangehoods and spray with a degreasing soap spray, leave to sit whilst you use the spray and a warm and wet microfibre to wash down the unit
- Use the same process for the tops of fridges and cabinetry (these get notoriously greasy and difficult to clean! Using the warm wet microfibre and a degreaser will radically improve the process)
- Remove items from fridge / freezer (defrost if you are going there) and use the non-toxic soap spray with warm wet microfibre to wipe and wash out fridge / freezer. Replace items
- Clean out the dishwasher filters and spray and wipe the door and door frame of the machine.
Step 5 - Bathrooms & Toilets
- Remove all bottles and objects from the vanity, bath and shower units
- Spray surfaces down with a good non-toxic soap-based spray cleaner and leave to sit a few minutes if the area is particularly dirty
- Meanwhile, flush the toilet and squirt your non-toxic toilet cleaner or your bathroom spray cleaner around the inside of the bowl, getting up under the rim. In conjunction with your bathroom cleaner, add a couple of scoops of oxygen bleach (such as Cleanz Oxy Soak) to remove tough stains and odours. Leave to dwell whilst you proceed with the next steps in the bathroom.
- Back to the bathroom, wash and wipe down all surfaces thoroughly with hot water and a clean microfibre cloth
- Buff glass panels, taps and surfaces dry
- NB: if you are cleaning a tiled area such as a splashback or shower room, sprinkle some oxygen bleach powder onto tiles and grout, spray with bathroom cleaner and scrub with a scrubbing brush and hot water to remove soap scum and stains
- Finish by using a glass cleaner and good quality glass cleaning cloth to clean mirrors and windows if necessary (don’t forget to wipe window ledge)
- If your taps have not come up gleaming, use the glass cleaner and cloth on those too
- Back to the Toilet, use the scrubbing brush to scrub the bowl, u-bend and under rim thoroughly
- Hold brush in position for water to rinse it as you flush
- Spray your Bathroom cleaner around the outside of the toilet bowl, under the seat, on top of the seat, lid cover and cisterne.
- We suggest using single use paper towel here for maxim hygiene (and it can be composted at home as long as you are using non-toxic cleaning products), or a cloth you will not use on anything else before it’s next soak and wash) to wipe down every surface you have sprayed, starting from the top of the cisterne and working your way down to the outside bowl and foot of the toilet
Step 6 - Glass (windows, tables, mirrors etc)
- Remove any thick residue with your all-purpose spray cleaner (or soapy water) and a warm wet microfibre
- Spray glass surfaces throughout the house with glass cleaner and buff clean with window cloth
If you are planning to clean the outside of your windows, follow these steps:
- Make sure your windows are closed properly!
- Hose or wet down any extremely soiled windows (eg. covered in pollen, heavy dirt or mud, spray residues, sea salt etc)
- Wash thoroughly with soapy water and a microfibre cloth - scrape down with a window squidgy / raclette if you have one
- Spray all over (or spot clean as necessary) with a non-toxic glass cleaner and buff clean and clear with a good quality window cleaning cloth
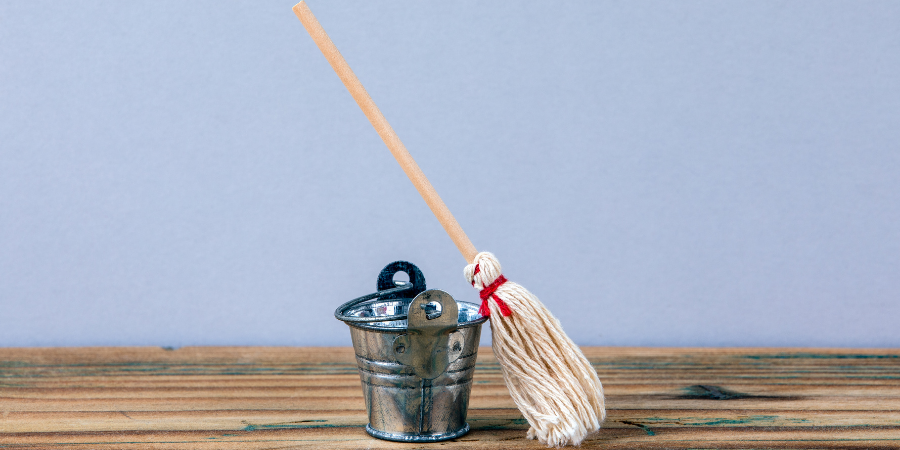
Step 7 - Mop Up! (all non-carpeted flooring)
- Use a bucket of hot water with a non-toxic floor cleaner such as Cleanz Concentrate (or special wood care cleaner for wooden floors)
-
Ensure you have a clean mop head and proceed to mop surfaces, mopping yourself towards an exit and changing water between kitchen / common areas and the bathroom / toilet areas.
Step 8 - Finishing Touches
- Remake beds with fresh linen when you can access over a dry floor
- Replace all soft furnishings (rugs, cushions etc)
Step 9 - Finish up!
- Put your arsenal back in the cupboard (removing all used cloths, rubbish etc) ready for next time
- Soak your microfibres in a bucket of hot water and oxygen bleach for at least an hour (overnight for best results)
- Drain them and wash in machine with a non-toxic laundry liquid on a very hot wash
- Hang out to dry and you’re done
Eco Tip: Check out these Guppyfriend Washing Bags! You can wash your microfibre cloths and any fabrics containing microfibre or polyester in these wash bags which collect any particles that may shed from synthetic materials. Awesome!
Et voila! Not only is your house clean, detoxified, tidy and fresh, but you just got in some healthy incidental exercise - extra brownie points for you!
Water your plants, put some fresh flowers on the table (if your not allergic), sit down with a cuppa in your favourite spot and admire your work :)Leave a comment
Comments will be approved before showing up.